Installing a bidet might appear intimidating at first, particularly if you're not well-versed in plumbing. However, with the right tools for bidet installation, this task can be more straightforward than you'd expect. Whether you're a seasoned professional or a hands-on homeowner, knowing the necessary tools for this project is crucial for a smooth installation.

Why Consider a Bidet?
Before we get into the details about the tools needed for a bidet installation, let's discuss why so many people are integrating bidets into their bathrooms. Bidets provide a cleaner and more eco-friendly option compared to toilet paper, helping to diminish paper waste while enhancing overall bathroom hygiene. As awareness of these advantages increases, the popularity of bidet installations continues to soar.
Key Tools for Bidet Installation
To install a bidet successfully, youll need a few key tools. Below is a list of the tools for bidet installation:
1. Adjustable Wrench
An adjustable wrench is essential for loosening and tightening the nuts and bolts that attach your bidet to the existing plumbing. This versatile tool can adjust to various fitting sizes, which is highly beneficial.
2. Screwdriver Set
A solid set of screwdrivers is vital for both removing and securing screws, particularly if your bidet has a seat attachment or electronic components. Typically, both flathead and Phillips screwdrivers will be necessary.
3. Teflon Tape
Teflon tape, commonly known as plumber's tape, is used to seal pipe threads, preventing any leaks and ensuring a solid connection between the bidet and your water supply.
4. Drill (Optional)
If mounting your bidet on the wall or adding extra support for the seat is required, a drill will help create the necessary holes. Be sure to have the right drill bits suited for your bathroom's material, whether it is tile, wood, or drywall.
Additional Tools and Supplies
While the aforementioned tools are fundamental, there are some additional supplies that might prove useful, especially for specific bidet installations:
Plumber's Putty
Plumber's putty helps form watertight seals around drains and other plumbing fixtures. It's particularly useful if you're adjusting your plumbing to accommodate the new bidet.
Level
A level is important to ensure your bidet is installed straight, preventing any awkward angles that could affect its operation.
Bucket and Towels
Having a bucket and towels handy can assist in managing any water spills that may occur during the process of connecting or disconnecting plumbing lines.
Your Step-by-Step Guide to Bidet Installation
Once you have gathered the tools for bidet installation, youre ready to embark on the installation journey. Heres a general step-by-step guide:
Step 1: Turn Off the Water Supply
Prior to altering any plumbing, make sure to turn off the water supply to avoid leaks or damage during the installation.
Step 2: Remove the Existing Toilet Seat
Utilize your screwdriver to remove the screws that are holding the current toilet seat in place. Set the seat aside carefully.
Step 3: Install the Bidet Attachment
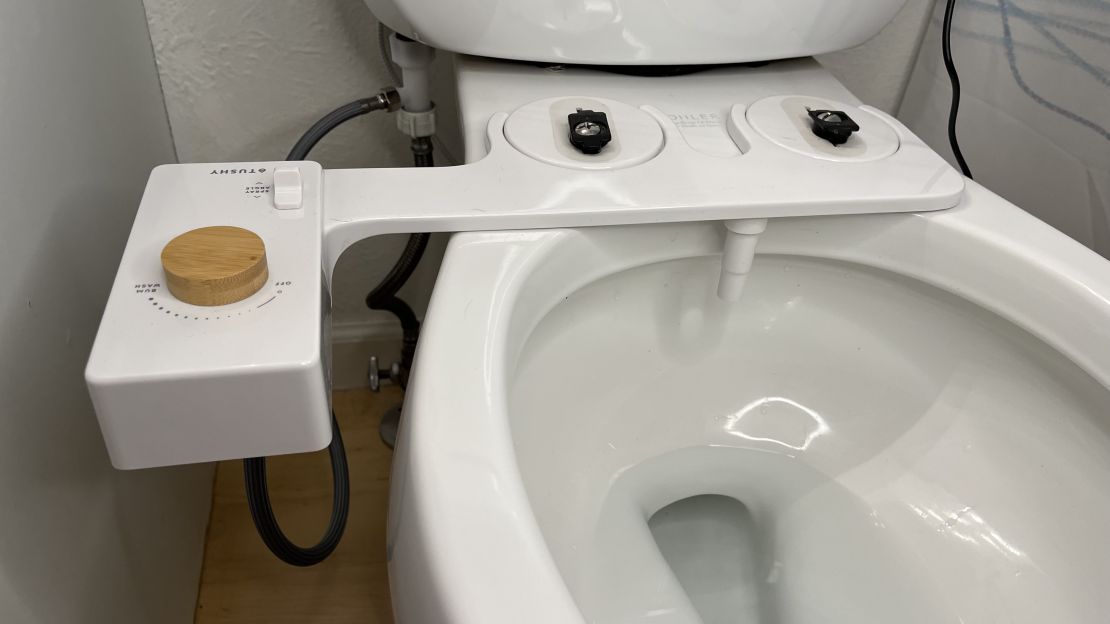
If you're setting up a bidet attachment, position it on the toilet rim as per the manufacturer's guidelines. Secure it in place using the adjustable wrench and the provided nuts and bolts.
Step 4: Connect the Water Supply
Attach the bidet's water supply hose to the toilet's fill valve. Make sure to apply Teflon tape on the threads for a tight seal. Once completed, restore the water supply and check for any leaks.
Common Challenges and How to Overcome Them
Although bidet installation is typically straightforward, you may face some challenges along the way. Here are a few common issues and their solutions:
Leaks
If you discover any leaks around your connections, double-check that all fittings are tightened and consider adding more Teflon tape if necessary.
Compatibility Issues
Not all bidets will fit every toilet model. Be sure to verify the specifications before making a purchase to guarantee compatibility.
Frequently Asked Questions
What common tools for bidet installation should I have?
The most frequently used tools include an adjustable wrench, screwdriver set, Teflon tape, and potentially a drill.
How long does it typically take to install a bidet?
Most bidet installations can be completed within 1-2 hours, depending on your plumbing experience.
Can I handle the bidet installation on my own?
Absolutely! With the right tools and clear instructions, most individuals can successfully install a bidet without requiring professional assistance.

Conclusion
Equipping yourself with the right tools for bidet installation can simplify the process and lead to a successful result. Whether you are a pro in the industry or just a homeowner aiming to revamp your bathroom, understanding the tools and steps involved is essential. For more thorough information, check out this guide on bidet attachments and enhance your knowledge. With these tools and tips, youre on the right track to experiencing the numerous benefits that a bidet brings. Also, for more cleaning advice, visit this NY Times guide for a comprehensive approach!
This article contains affiliate links. We may earn a commission at no extra cost to you.


